One of the three Rudders hot glued to the pivot tube & locking bars and rough sanded to shape. |

|
One of the three rudders after final shaping and with filler applied to all depressions. |

|
This is the general idea for the shape of the reinforcing wood strips used on the H7 & H9 panels. The
1st piece was hot glued to the panel edge, then the 2nd piece was epoxied to the 1st as well as to the panel. |

|
A view of the H7 & H9 panels after the reinforcing wood is attached. |
|
This is the H1 panel with the reinforcing edges and the doubler installed. |

|
These are the H8A, H8B & two H9 bow panels. |

|
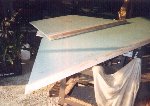
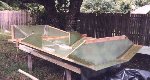
All the main hull panels in the general location of where they will be after assembly. |

|
These are the H1, H6 & two H7 main hull panels. The small strip is part of the modified H6 panel which
lets H1 move forward 6 inches. Moving the H1 panel is another modification to the original plans. |

|
This is the Dash Panel being drawn to shape. Originally it was to have a rounded top. For
ease of the forward deck construction it now has been slightly squared off. |
|
These are the two H1F panels and the H1D dashboard panel. These panels are one of the modifications I am
doing that are not in the plans. |

|
The H1 panel braced in position on H6. Note the modified forward positioning of the panel. |

|
The braced H1panel and the H7 side panels with foam and putty fillets ready for tape and resin. I cut
triangular strips from the foam to use as filler in all the 90 degree corners. Isophtholic putty is used in all other corners and joints. |

|
This is looking towards the front at the H1, two H1Fs, H6 & two H7 panels. This picture clearly shows
the reversed installation of the H7 side panels! |
|
The main hull panels have the biaxial tape cut and laid in place awaiting the resin. Note the temporary
cross brace to hold the H7 panels in the proper position. Why didn't I notice the H7 panels before they were glassed in place!!! |
|
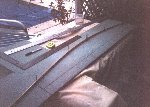
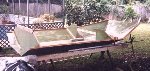
After the main hull panel joints were glassed together, the bow panels were installed. I trimmed the front
of the H7 panels square and will install the cutoff pieces to the rear of the panels later. |
|
Another view after the main hull panels were glassed together and the bow panels were installed. |
|
Looking at the bow panels and the H1F panels from the inside of the main hull. The bricks are just weights
used to help keep the hull from shifting while working on the bow panels. |
|
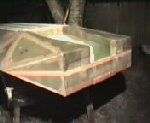
Another view of the bow panels assembled to the main hull. the cross brace will remain in position until
the main stringers, side deck braces and diagonal braces are installed. |

|
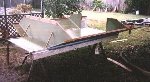
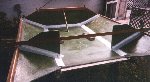
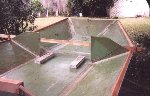
Modified Aft Floatation Chambers. You can see how they have been extended downwards (up in the pic) all the
way from H4 to the H6 bottom panel. |

|
Another view of the Aft Floatation Compartments. You can clearly see the Modified H4, H10, H11 & H12
panels here. |
|
