I had to remove the tailpipe from the exhaust manifold so I could adapt a SS flex pipe to it. I
used a 1.75" ID to 2" OD adapter to get form the manifold to the flex pipe. |

|
Then I used a 2" inlet/outlet "Cherry Bomb" glasspack muffler to help keep it quiet. It actually does quite
a good job. |
|
I removed the EGR valve completely to save a little weight and covered the passages in the intake manifold with
an aluminum that plate I made. |
|
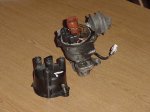
I removed the original distributor which required the use of the ECM and replaced it with a 1991 distributor with
the self contained electronic ignition system and vacuum advance module. |
|
I also removed the original fuel injector carb because it also required the ECM. |

|
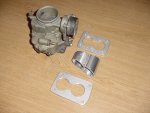
I bought a VW Beetle replacement carb since those engines were very close to the same size as the GEO. I
had to make a special adapter to mount it to the intake manifold. |
|
I had to make two aluminum plates to use to mount the starter. |
|
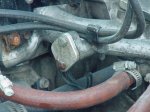
I also bypassed the PCV and just ran a breather hose form the valve cover to the fitting on the bottom of the air cleaner. |

|
I decided to try a larger carb and see if it would give me a little more HP at the lower rpms and
maybe a slightly higher max engine rpm too. It's a Holley 200 cfm carb, the size used on some VW Beetle engine upgrades years ago. If it gives me the extra power I want without eating to much
fuel I'll keep it. Now I need to build another adapter to mount it to the intake manifold. |

|
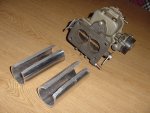
I took two aluminum pipes and cut them down the side so they can be welded together. Then I'll build a new
top and bottom plate so I can mount it to the intake manifold. I'm glad we work with aluminum down at the shop! |

|
Here are the three pieces of the new adapter, before and after welding. I currently have epoxy
setting up in all the inside seams. After it's setup I will sand and polish the inside completely.
I still have to look at how the throttle linkage will attach after the engine is back on as it
is slightly different than the VW carb. |

|
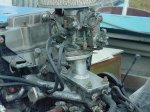
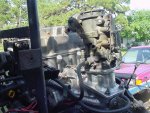
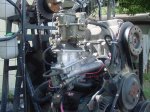
The carb and adapter are finally mounted. I also had to change the throttle cable (not shown here). It is a 3/32"
SS wire inside a vinyl coated metal jacket.Initial run-up on the trailer was great. The engine started right up, there's no hesitation, rpm comes up very fast and the power seems to very good. |
|
| |
|
|
|


