I built a crossbar and welded two short tubes to them for the idler arm pivot bolt. Then it was reinforced
with a piece of angle and a thickening plate for the adjusting bolt. |
|
The tension for the idler arm is from a bolt through the two plates pointing to the rear. When the bolt is
tightened the arm swings back tightening the fan belt. |

|
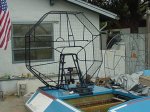
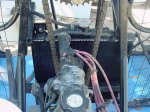
I finally got the new stand/guard installed! I have the fan centered and most of the stand's mounting bolts
installed. Next comes the engine. She's also getting a fresh paint job too! |
|
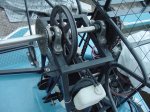
This is looking down on the whole drive system assembly. The sprocket on the left side of the shaft is half
of the prop mounting hub system. |
|
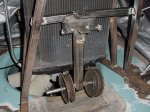
Looking from the starboard side. The two forward vertical tubes support the drive shaft bearing and radiator
brackets. The drive sprocket is as close to the stand as I can get it. |
|
Looking forward. The fan belt easily clears under the radiator. The Idler pulleys are attached to a
vertical pivot bar and swing tothe rear for tensioning. |

|
From left to right:
prop hub mounting sprocket, rear bearing, fan drive pulley, forward bearing & prop
shaft driven sprocket. |

|
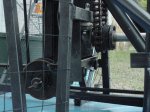
Well, I discovered another "little" problem today. The chain is just a bit too close to the radiator
hose. I am building a crossbar with a plate that will fit between the chain and the hose. |
|
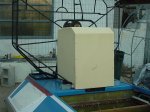
The basic box has been hot glued together. I will try rounding off some of the corners for better
looks. It appears as though the fan and radiator will both be able to get plenty of air. |
|
|
|
| |
|
|
|


